Showing posts with label Dessert. Show all posts

Sunday, November 21, 2010

Creme Puffs

2011. Those four numbers put together are very significant to me. In 2011, I will be married to my wonderful husband for 10 years. In 2011, our oldest child will start kindergarten. In 2011, I will turn 30 years old, and look back at my life so far with the utmost joy. In 2011, I will have the same best friend for the last 20 years. We have experienced first kisses, first broken hearts, college, weddings, breast cancer, and child birth together.

So many things about life have built me into the strong, smart, independent woman I am now. Every time I've been tripped up by life, I've had someone there that loves me to help me back up. Every struggle I've gone through I've had a best friend there to comfort me.

I didn't make any new years resolutions this year. Resolutions seem to be made to be broken. But I have so many dreams and wishes that I am going to watch come true this year instead. In 2011, I am going to not care about my scale, but instead my energy level and how my body feels. I am going to treat my body like I do my family...with love and respect. I will respect my body by feeding it healthy food, exercising regularly and sleeping plenty.

In 2011, I am going to do a better job at being a friend, a wife, and a mom. Somewhere along the line, the calendar started flipping my months instead of days. My children grew, my friends became busy with their children, my husbands business flourished. And now it feels like I'm missing chunks of time. So this year, I will stop for coffee with friends, I will bake cookies for no reason and drop them off at friends' houses, I will eat dinner by candle light with my husband, and I will waste entire Saturdays at the park with my kids. I will neglect nothing by my dirty laundry.

So here's to a great year ahead of us!

Pastry Puffs

1 Cup Water
1/2 cup unsalted butter
1 teaspoon sugar
1 1/2 - 2 cups flour
4 large eggs

Preheat your oven to 425 degrees. Line your baking sheets with parchment paper or a sil-pat.

In a saucepan, bring the water, butter and sugar to a boil over high heat. Immediately remove from heat once boiling starts and with a wood spoon stir in all-purpose flour. Continue to stir until the mixture begins to pull away from sides of pan (about 2 minutes), as pictured below.

Let mixture slightly cool (about 2 minutes) and add eggs, one at a time and stirring after each addition, until batter comes together.

Transfer batter into a piping bag or ziplock bag and cut off corner of bag about 1/2" up the side. Pipe into desired sized mounds (1" apart) onto lined baking sheets.

Bake 10 minutes, then reduce heat to 350 degrees and bake until your puffs are golden brown and feel light and hollow in the center...about 20 minutes.
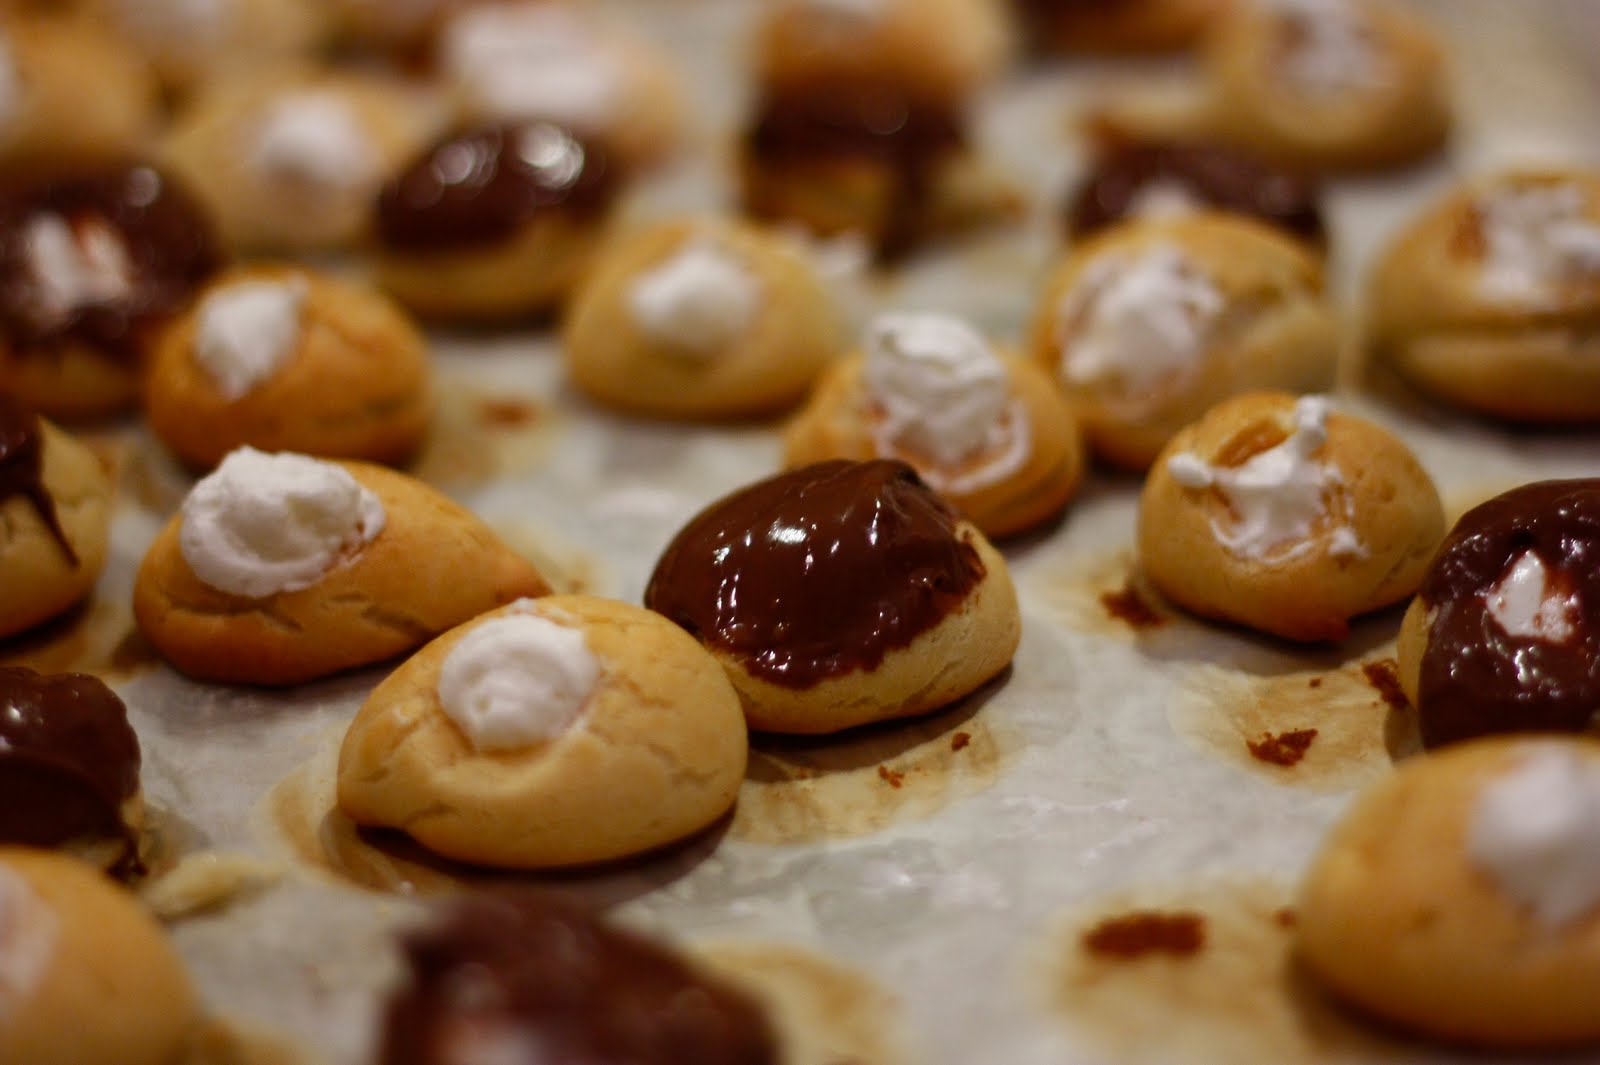

I filled mine with whipped cream and dipped them in melted semi-sweet chocolate! Delicious!!
(To make whipped cream, combine 1 cup heavy whipping cream and 3 tablespoons sugar, then whip until light and fluffy).

Enjoy!

Sticky Buns

I love the holiday season simply because it gives me the excuse to bake everything that is not good for me. Especially sticky buns. I NEVER make sticky buns unless winter and Christmas is close. Then I have an excuse to wear a ridiculously large sweater to cover up the sticky buns that have...well...stuck themselves directly to MY buns.

Mmm...see all that gorgeous caramel in the bottom of the pan? During the months of November and December only it is fat free caramel. Just pretend and when you consume half the pan you won't feel so bad!
One other great thing about sticky buns is when its freezing cold outside you have an excuse to run your oven half the day and heat up your kitchen. Then you should probably go and run your butt off on the treadmill because you are definitely going to need it!

Sticky Buns
slightly adapted from Cheeky Kitchen

Basic Roll Dough
2 cups warm water (115 degrees)
3 3/8 teaspoons yeast
1/2 cup sugar
3/8 cup eggs, beaten (its 1 1/2 eggs)
1/4 cup butter, melted
1 teaspoon salt
5-6 cups all purpose flour
Sweet Roll Filling
4 tablespoons cinnamon
1 cup soft butter
2 cups brown sugar
Sticky Caramel Topping
1/2 cup butter
1/2 cup sour cream
1 1/2 cup brown sugar
1 cup dark karo syrup
1 tablespoon vanilla
In the bowl of your stand mixer, add warm water, yeast and sugar. Let set for 5-10 minutes until the yeast activates and forms a foam on top of the water. Add eggs, butter and salt and mix on low with the dough hook attachment about 2 minutes, until ingredients are combined. Add 5 cups of flour and mix on low about 5 minutes until dough becomes elastic and starts to clean away from side of the bowl. Add up to 1 additional cup of flour if needed. The dough is supposed to be light and slightly sticky. Oil a large glass bowl and place dough in bowl, turning so the greased side is up. Cover lightly with a layer of plastic wrap and a kitchen towel and place in a warm spot for 1 hour, until dough has doubled in size.
Stir ingredients for the filling together in a bowl until well combined. Roll dough out into a 9"x24" rectangle. It will end up roughly 3/4" thick. Using a rubber spatula, carefully spread filling over entire surface of dough and roll the long way into a log and pinch together the seam. Cut rolls 1" thick, so you get 24 rolls.
Now we need to prepare the sinfully delicious topping! In a sauce pan, melt butter over medium high heat until melted. Whisk in remaining ingredients and bring just to boiling. Remove from heat and pour into four 8" round cake pans.
Place 6 rolls into each pan on top of caramel sauce. Allow rolls to raise for about 30 minutes until they have not quite doubled in size. I usually raise them just until the rolls start to touch.
Bake in a 375 degree preheated oven for 15 to 17 minutes just until rolls start to turn brown on the edges.
When you remove rolls from the oven, if you are going to serve them right away, place a plate on top of pan and quickly invert rolls onto the plate. The caramel is HOT so be careful! If you'd like to freeze them for later, I simply cover cake pans with 2 layers of tight tinfoil and freeze. To reheat, place rolls still covered in tinfoil in a 300 degree oven for 15 minutes and invert onto a plate after removing from oven.
Enjoy, Enjoy, and then run on your treadmill. Then congratulate yourself for working out with another sticky bun. Repeat process until they're gone.

Orange Rolls

I spent the entire day Saturday in the kitchen with my mom. The weather has officially switched to winter. Its cold...and snowing...and cold...did I mention that already? I can't think of a better way to waste a weekend then by spending it in the kitchen with the woman that taught me to cook. There was flour everywhere. There was sugar everywhere. There were dirty dishes everywhere...anyone what to come over and wash them for me? No? I don't blame you...I don't want to wash them either!

Brown sugar, butter and orange zest...the thoughts of cold and snow are melting from my brain. All I can think about now is the sweet filling in these rolls!

Orange Rolls:

For the Rolls
1/2 cup water
1/2 cup milk
1/3 cup sugar
2 1/4 teaspoons active dry yeast (.25 oz package)
1 egg
1/3 cup butter, softened
1 teaspoon salt
3 3/4 cups all-purpose flour

For the Filling:
1 cup brown sugar
1/3 cup butter, softened
zest of two oranges

For the Glaze:
3 ounces cream cheese
1/4 cup butter, softened
1 1/2 cup powdered sugar
1/2 teaspoon almond extract
juice of 1/2 orange
1/8 teaspoon salt

Heat milk and water in a sauce pan until mixture reaches 120 degrees. Pour milk and water into your stand mixer bowl with the dough hook attachment. Add sugar and yeast and put mixer on stir just so it make one loop around. Let mixture set about 5-8 minutes until it froths (yeast activating).
Add egg, butter, salt and flour and mix on low speed for roughly 5-8 minutes until dough becomes elastic and should start to pull away from side of the bowl. The dough will still be sticky.

Grease a large bowl. Add dough to bowl and turn dough over so the top is greased. Place dough in a warm draft free place to raise for roughly one hour until it has doubled in size. I like to turn the oven on 400 degrees for 2 minutes, turn oven off, then place bowl in the oven.

Meanwhile, make your filling by adding sugar, butter and zest into a small bowl and mashing together with a fork until mixture is well combined.

Punch down dough and place on your floured countertop. Roll dough into 24"x6" rectangle. Spread filling mix onto dough with a rubber spatula, making sure to cover the entire surface. Roll dough the long way into a log and pinch the seam together. Cut rolls 1" wide. Know what my mom just taught me? Slide a piece of dental floss under the dough, and cross over the top, pulling quickly. This will give you a nice clean cut without smooshing your rolls.

Place rolls on a baking sheet about 1/2" apart so they have room to raise. Cover with a dish towel and allow 45 minutes to raise. Bake in a 350 degree preheated oven for 15-20 minutes until rolls are lightly browned on top. Allow rolls to completely cool.

For glaze, whisk together butter, cream cheese, powdered sugar, almond extract, orange juice and salt until icing is smooth and creamy. Top cooled rolls and ENJOY!


Saturday, November 13, 2010

Fudge

What do you have better to do then make fudge when you wake up in the morning and find 2" of snow blanketed across your front yard? Well, make fudge and pumpkin chocolate chunk blondies and a LARGE cup of coffee. Make sure you get your chocolate fix so that when you come to the reality that for the next 4 months you'll have to get up 30 minutes earlier every morning so that you can wrap the kids in hats, scarfs, mittens, snow pants, jackets and boots you'll be able to handle it. It is very important to be properly caffinated and sugared when you come to such realizations.

Fudge (Recipe from My Baking Addiction)

2 cups semi-sweet chocolate chips
1 cup milk chocolate chips
1 14 ounce can sweetened condensed milk
1/4 teaspoon kosher salt
1 cup chopped nuts (I used walnuts)
1 1/2 teaspoons pure vanilla extract

Line a 9" or 8" square pan with tin foil so you can easily lift the fudge out to cut it into chunks. Set aside.

In a sauce pan over low heat, add chocolate, sweetened condensed milk and salt and stir until all chips are melted. Remove from heat and stir in chopped nuts and vanilla extract. Spread evenly into foil covered pan and chill for 3 hours until fudge is firm. Remove from foil and place on a cutting board and cut into desired size squares.

Store covered in the refrigerator.

Sunday, November 7, 2010

Pumpkin Cheesecake with Gingersnap Crust


mmm...pumpkin. Double mmm...pumpkin cheesecake! Everything at my house lately has been about pumpkin. We've had pumpkin waffles, pumpkin muffins, pumpkin bread and now pumpkin cheesecake which is by far the family favorite of all the pumpkin recipes thus far. I have not make a classic pumpkin pie yet though, I usually save that for Thanksgiving.

Pumpkin Cheesecake with Gingersnap Crust

3 cups crushed gingersnap cookies
1 stick (1/2 cup) butter, melted

3 packages cream cheese
1 15 ounce can pureed pumpkin
3 eggs plus 1 yolk
1/4 cup sour cream
1 1/2 cup sugar
1 teaspoon cinnamon
1/2 teaspoon nutmeg
1/2 teaspoon cloves
2 tablespoons flour
1 teaspoon vanilla

Preheat oven to 350 degrees.

Using a rolling pin and ziploc baggy if you need to get out some aggression or a food processor if you want to go the easy route, crush ginger snaps into a fine crumb until you get 3 cups. Make sure to buy a hard, dry cookie. Add melted butter into food processor and pulse to combine crumbs and butter. Press cookie crumbs onto the bottom and up the sides of a 10" spring form pan, using a flat measuring cup. Be sure to firmly press crumbs so they are compact enough to hold shape in the pan.

Add cream cheese to your mixer bowl and beat until smooth. Add pumpkin, eggs, sour cream, sugar and spices. Mix again until combined, then add flour and vanilla. Beat on medium high until the batter is smooth and silky. Pour mixture into crust.

Bake for 60 minutes until center or cream cheese is set. Remove from oven and let rest on counter for 20 minutes, then cover with plastic and refrigerate for 4 hours before enjoying!!

Friday, November 5, 2010

Maple Pecan Scones


In need of a quick pastry to impress some last minute drop-in visitors? These scones are delicious, elegant and easy to make. They come together in minutes but look like you've planned something special!

Maple Pecan Scones
(slightly adapted from The Pioneer Woman Cooks)

Scones
1 1/2 cups whole wheat flour
1 1/2 cups all-purpose flour
1/3 cup sugar
5 teaspoons baking powder
1 teaspoon salt
2 sticks butter, chilled and cut into 1 tbls chunks
1/4 cup pecans, finely chopped, plus more for sprinkling
1 large egg
3/4 cup heavy cream

Icing
1 pound powder sugar
1/4 cup heavy cream
4 tablespoons butter, melted
2 tablespoon hot water
1 single serving packet of instant coffee granules
dash of salt
1 tablespoon pure maple syrup


Preheat oven to 350 degrees. In a large bowl, add your flour, sugar, baking powder and salt and whisk together. Cut in the cold butter with a pastry cutter or a fork until the mix resembles small crumbs. You still want chunks of butter visible to don't go overboard with the cutting! Add finely chopped pecans. I buy the whole pecans because they are cheaper and pulse them in the food processor just for a few seconds. In a separate small bowl, mix the cream and egg together and add to the flour/butter mixture. Stir together until just combined. The batter will still be quite crumbly. Dump mixture onto a cutting board and split into two. With your hands, press the mixture into two circles about 5 to 6 inches in diameter and 3/4 inch think then cut into 8 wedges. Move your wedges onto a baking sheet lined with parchment paper and bake for 20 to 23 minutes. You don't want your scones to brown on the edges.

For the icing, stir instant coffee into the hot water and then combine all ingredients into a bowl and whisk together until smooth.

When scones are done baking, remove from cookie sheet and place on a wire rack with a cookie sheet underneath. After they have completely cooled, drizzle plenty of icing over the top and sprinkle with chopped pecans!

Enjoy!!

Saturday, August 28, 2010

Spiced Apple Cake


Goodness, summer has flown by. I can't believe September is next week already! In two short weeks my little Walnut will be getting on the big yellow school bus and going to preschool. When did he turn 5 years old? What happened to ages 3 and 4? I must have blinked at some moment and life fast forwarded on me by about 3 years.

The breeze has started to change already and the first indications of fall are already in the air. The humid depressive days of summer are turning into cool, refreshing breezes and chilly, serene mornings with beautiful sun rises.

I couldn't be more excited for fall to come this year. Walnut starting preschool, growing into a strong independant little man.

Apples are also one of the wonders of fall in Minnesota. One tradition we always have in our house is to go to the apple orchard and take the tractor ride though the hundreds of apple trees...enjoying the breeze and sunshine on our faces. Here is a favorite recipe of mine when I bring my bags full of fresh apples home.

Spiced Apple Cake

2 cups plus 2 Tbsp all purpose flour
2 tsp baking powder
2 tsp ground cinnamon
1/8 tsp nutmeg
1/8 tsp cloves
1/2 cup butter
1 cup packed brown sugar
1 cup sugar
2 eggs
1 Tbsp vanilla extract
1-2 large apples, cored and sliced
1 teaspoon cinnamon and 2 tablespoons sugar mixed for sprinkling

Preheat oven to 350 degrees and spay a 9×13 baking pan with an oil and flour baking spray.
In medium bowl, combine flour, baking powder, cloves, cinnamon and nutmeg. Whisk to combine well and set aside.

In bowl of stand mixer, combine sugars and butter and beat until light and fluffy, about 1 minute. Add eggs, one at a time, beating well to combine. Add vanilla extract and beat to combine.

Turn mixer on slow and fold in flour mixture a little at a time until just combined.
Spread mixture evenly into prepared pan. Layer top with apple slices so they all face the same way, and sprinkle top generously with cinnamon and sugar.

Place in oven and bake until cooked through, when top slightly bounces back to the touch, about 40 minutes, you may need an extra 5 minutes if it looks too soft.

Remove from oven and let cool completely before removing from pan, cutting and serving. Serve while warm from the over with a scoop of ice cream!

Enjoy!

Wednesday, August 4, 2010

Banana Oreo Delight


So, I needed a dessert I could throw together at the office today during my lunch break for my boss's birthday. This is actually the same as an Oreo Dirt Cake but with Golden Oreos and pudding. And you know what? It tastes just like banana creme pie! So I suppose we could make this Cheater Banana Pie too! No baking required and obviously easy enough to assemble anywhere.

Banana Oreo Delight

1 Package Golden Oreos
1 Large package Instant Banana Pudding
1 - 8 ounce package Cream Cheese
2 - 8 ounce tubs Cool Whip
1/2 cup powdered sugar
1/2 cup melted butter

Place Oreos in a gallon baggie and crush with a rolling pin into fine bits. Put 1 cup aside. Mix remaining Oreos with 1/2 cup melted butter and press into the bottom of a 9x13 pan. With a mixer, blend cream cheese until smooth. Add 1 1/2 tubs of Cool Whip and powdered sugar. Spread over Oreos. Make banana pudding according to package directions and spread pudding over top of cream cheese mix. Spread the rest of the Cool Whip on top of the pudding. Last, sprinkle the rest of the Oreos on top. Allow to refrigerate for an hour before serving.

Enjoy!!!

Friday, July 16, 2010

S'mores Bars


These things go like hot cakes! If you need to bring a bar to a pot luck or something this is your recipe. It comes together in a matter of minutes with no dishes besides the pan you bake it in and a plastic bag, what else could you ask for??

S'mores Bars

12 graham crackers, crushed
3/4 cup butter, melted
3/4 cup brown sugar
about 1 bag marshmallows
about 1 bag milk chocolate chips

Place graham crackers in a gallon size plastic bag and crush with a can or rolling pin until you have fine crumbs. Place in a 9x13 baking dish. Melt butter in microwave. Pour melted butter over graham cracker crumbs and add brown sugar and stir with a fork until the butter is combined with the crumbs. Then using your fingers or the bottom of a measuring cup, press firmly to the bottom of the pan. Bake in a 375 degree oven for 10 minutes until the edges of the crust start to brown. Remove from oven. Turn off your oven and turn broiler on high. Pour marshmallows and chocolate chips on top of crust and place pan about 6" under your broiler. Leave the door open so you can watch your bars closely. It only takes about 1 1/2 minutes for your marshmallow to brown and get puffy. Remove from oven when marshmallows are nice and brown. Let bars cool completely before cutting and enjoy!

Tuesday, June 15, 2010

Snickerdoodle Blondies


Dear Friends,
I'd like to apologize to your hips and bottom right now before I go on. This recipe may cause you to eat half the pan as soon as they come out of the oven...therefore...making your aforementioned regions...well...grow. I'm sorry! Every time I've brought these bars to a BBQ or work or to a family member's house they've been polished off within the first hour. Please forgive me.
Love,
Teri


Snickerdoodle Blondies

2 2/3 cups all-purpose flour
2 teaspoons baking powder
1 teaspoon cinnamon
1/2 teaspoon nutmeg
1 teaspoon salt
2 cups packed brown sugar
1 cup butter, room temp
1 tablespoon vanilla

Topping:
2 tablespoons granulated sugar
2 teaspoons cinnamon
1/2 teaspoon nutmeg

Preheat oven to 350 degrees. Lightly grease or line a 9" by 13" pan. Sift together flour, baking powder, cinnamon, nutmeg and salt. Set aside.

Using your mixer with the paddle attachment, beat together butter and brown sugar for 3-5 minutes until light and creamy. Add eggs one at a time and then add vanilla. Beat until smooth. Mix in flour mixture on low until well blended. Spread evenly in pan.

Combine granulated sugar, cinnamon and nutmeg and evenly coat top of batter.

Bake 35-40 minutes. Cool before cutting (which I did not...I had to get going to a birthday party, which resulted in my chunky looking bars).

Friday, May 7, 2010

Rhubarb Crisp Bars


Did you know it is supposed to SNOW tonight in Minnesota? What? We had full weeks in April of 70 degree weather and now in May its going to snow? How is a person supposed to cope with this? Can I tell you a secret and do you promise not to tell my husband? I coped very well by treating myself to $120 cowgirl boots and by baking this Delicious rhubarb pie/crumble/bar type thing. They were divine. Rhubarb isn't quite ready yet this season...but I still had some frozen and stashed in my freezer from last year. I couldn't decide if I wanted to make a pie or a crisp so I did both! The base layer is a press-in pie crust with rhubarb in the middle and an oat based crisp on top. Wow...were they awesome...so awesome I ate half the pan and vowed never to make them again. We'll see.


Rhubarb Crisp Bars


For Pie Crust:
1 cup flour
2 tbls sugar
1/2 tsp salt
1/2 cup butter


For Rhubarb Filling:
3 cups chopped rhubarb
3/4 cup white sugar
2 tbls corn starch


For Crisp Topping:
3/4 c sugar
3/4 quick cooking oats
1/2 c brown sugar
1/2 tsp baking powder
1/4 tsp salt
7 tbls butter


Preheat oven to 350 degrees.

For the crust, combine flour, sugar and salt in a bowl. Add the butter and using a pastry cutter, work ingredients until it is well combined. The dough will be crumbly. Press crust into an 8x8 glass pan with your fingers or the bottom of a measuring cup.


Next for the rhubarb filling, combine rhubarb, 3/4 c sugar and cornstarch in a bowl and dump over crust, speading until even.


Last for the crumb topping, combine flour, oats, brown sugar, baking powder and salt in a bowl. Cut butter into pats and with your hands work the butter into the dry ingredients until it is combined and crumbly. Then break mixture into little crumbs over the top of rhubarb, speading evenly over the top.
Bake for 40 minutes if you have fresh rhubarb...mine was frozen so I ended up baking it for 60 minutes. When entire top is nice and golden brown pull it out of the oven and dig in immediately! Serve with a big scoop of vanilla ice cream if your into that.
Enjoy!


Wednesday, April 14, 2010

Lemon Bars


When life gives you lemons...you make lemon bars right? All that sugary, sour sweetness is exactly what I need to bring a little sunshine into some not so sunny days here in Minnesota. Spring is great...but lately the warm days have also brought a lot of wind which has forced my running back indoors. I really don't like the extra work to run into the wind along with the blowing sand and dirt that comes with it. But, on the bright side I've been able to use the track to time my miles again and see where I'm at. And guess what? I've gotten my miles down to 9 minutes and 15 seconds since hitting the outdoors this last February. That's 45 seconds faster per mile from last summer! I'm proud of that.
I learned today that there is a Triathlon Club in a city near mine and they meet every Tuesday and do hill sprints! Boy, that sounds crazy doesn't it? I mean, who the heck wants to run uphill on purpose for 30 minutes? Me...that's who. I am so there! Run up the hill, walk down and repeat. With other crazy people who want to do it too. Did you know that sprinting uphill actually will improve your over time in distance running? Yep! And I bet it burns extra calories so I can eat a few more lemon squares...

Lemon Squares
From Belle of the Kitchen (click to see her blog post)

For the Crust
1 3/4 c Flour
2/3 c Powdered Sugar
1/4 c Cornstarch
3/4 tsp Salt
1 1/2 sticks Unsalted Butter

For the Filling
6 eggs, room temperature
3 cup sugar
Zest from 2 lemons
1 cup Lemon Juice (I used 5 lemons to get this much)
1 cup Flour
Powder Sugar for dusting

Preheat oven to 350 degrees. Spray a 13x9 lasagna pan with cooking spray and line with parchment paper, letting the paper come up the sides.

Add flour, powdered sugar, cornstarch and salt to food processor and pulse to blend. Cut butter into pats and add to food processor, blending for about 10 seconds. Then pulse until mix is pale yellow and looks like coarse meal...it should be about an additional 3 seconds of blending. Put mixture in your lined dish and press firmly with your fingers or a measuring cup to form an even layer over the entire pan. You should end up with about a 1/4" thick crust. Refrigerate for 30 minutes then bake 20-25 minutes until golden brown.

While the crust is baking, whisk together eggs, sugar, lemon zest, lemon juice and flour. When crust is done, pour lemon mixture over crust and bake an additional 30 to 35 minutes until the filling is firm and set. Allow to cool completely at room temperature. Use the parchment paper to remove from pan before cutting (make it easy on yourself). Peel down the sides and use a knife or pizza cutter (my favorite) to form however many bars you'd like...but these suckers are sweet and sour so you might want to keep them on the small side. Sprinkle with powdered sugar before serving.

Tuesday, March 30, 2010

A Birthday and Baklava

We have a multi-cultural family. My husband and his family are from Uzbekistan, an Asian country north of Afghanistan and west of China. We married just shortly after the September 11th attacks that were so devastating to so many, and I have seen first hand the stigma attached now to any country that ends in "istan" even when most of Americans have never heard of Uzbekistan and they automatically judge. Did you know "istan" stands for "land of?" So my husband and his loving, warm, caring family are from the Land of Uzbeks. What a colorful, happy culture they have brought into my home. There is so much history in every building and road and house in this wonderful country. The music and art has filled my house for the last 8 years that my husband and I have lived together, and even more so now that his mom has been staying with us for the past 10 months. The music specifically has filled my little peanut's heart and come out of her with, at times, some hilarious dance moves!
Yesterday was my mother-in-laws birthday. To celebrate, we dusted off the grill for the first time this spring and made some bbq chicken and potatoes. Wow...was that delicious! And, to share some art of my own for her to bring home to her country...I cross stitched some beautiful kitchen towels, hot pads, an apron and a table cloth for her. She has shared so much of herself with my family I thought the this would be the perfect time to share something that I worked on so hard with her.


We ended the celebration with a special request from the birthday girl herself...Baklava! Baklava is a rich honey and nut pastry that is best served with a nice cup of hot tea if you ask me! Many cultures have a version of Baklava and it is not exactly know where its orgins come from, but it is found in Greek, Turkish, Arab, Uzbek and Chinese cultures to name a few. It has been found to be a special treat served during Ramadan (a special religious time in the Islamic religion) in some countries. This is a favorite dessert of my mother-in-law, but it is very expensive to make in Uzbekistan, so the first time I pulled it out of the oven while she was here she was very excited! And I was excited that I made a dessert that she recognized without even knowing it!

Baklava

1 lb Walnuts, finely chopped

1 c butter, melted

2 tsp cinnamon

1/2 tsp Cloves

1 lb phyllo pastry (I use Athens brand)

a little lemon juice

2 c sugar

1 c honey

2 tsp vanilla

1 ½ c water


Make sure to follow directions on the phyllo package to properly thaw out your dough...or it will break when you unroll it and you will become easily frustrated!

If you buy the whole walnuts (its a lot cheaper), throw them in the food processor and pulse a few times until you get a fine chop. Mix the Walnuts, cinnamon and cloves and set aside.

Melt butter.

Butter a 9" x 13" pan and place 4 sheets of phyllo, using a pastry brush to brush melted butter on each individual sheet.

Add about 2/3 cups of walnut mixture on top and add 2 more sheets of phyllo, buttering each sheet.

Repeat until you either have only 4 sheets left (which you use for the top layer) or are out of walnut mix. I usually come pretty close to using one pack of phyllo (the Athens brand comes with 2 sealed bags).

Cut the baklava in a diamond pattern, making sure to get all the way to the bottom of the pan.

Top with the remaining butter and bake at 350 for 40 minutes (or until top is nicely golden brown.)


During the last 10 minutes of baking time, mix the sugar, honey, vanilla, lemon juice and 1 ½ cups of water in a pot and boil for 5 minutes.

Remove any froth off the top and pour over the baklava. I don't end up using all the honey mixture...usually about 2/3 of it.

Serve cold.