Friday, April 30, 2010

Lasagna


By far my favorite comfort food...and anytime I have to host a dinner party. I don't think many other meals can come together to feed a group of 10 people as easily as lasagna. If you make it the night before then all you have to do the day of the party is pop it in the oven and toss a salad. Also a great dish to make a few in disposable pans at about the 37 week mark of pregnancy then freezing them unbaked. Then after baby arrives all you have to do is take it out of the freezer and bake and your husband will be so impressed by how you were able to care for the new baby AND cook such a great dinner he'll give you a foot massage...

How many more meals do you know of that can bring you all the way through elegant dinner parties and pregnancy?

Lasagna

1 spaghetti sauce recipe (see here)
1 pound ground beef
9 lasagna noodles
1 - 24 oz tub cottage cheese
16 ounces shredded mozerella
16 ounces shredded parmesan
1 small can sliced black olive (optional)
1 small can sliced mushrooms (optional)

Preheat oven to 375 degrees.

Bring a large pot of water to a boil and put in lasagna noodles. Boil about 7 minutes until noodles are extremly al dente. You don't want to cook them all the way because they will be boiling in sauce in the oven and we don't want mushy noodles.

Follow spaghetti sauce recipe, adding 1 lb ground beef as you saute the onion and garlic. (Or use your favorite jarred spaghetti sauce, I won't judge.) If you'd like, you can also stir in a can of mushrooms and a can of olives.

Spray a 9x13 lasagna pan with cooking oil spray. Lay down 3 noodles in bottom of pan. Layer with 1/3 of spaghetti sauce followed by 1/3 of cottage cheese and 1/3 of each the mozzerella and parmesan cheeses. Continue until you have 3 layers.

Bake uncovered 45 minutes, making sure the top is nice and brown. Let set about 10 minutes out of oven before cutting to let the cheese set up.

Enjoy!!!

Wednesday, April 28, 2010

Spiced Molasses Cookies


Another gem of a recipe that I found is Pioneer Woman's Spiced Molasses Cookies. I like to pull these out for cookie exchanges and Christmas time, or when I bake cookies to send to my brother since they are his favorite. I like to mix it up a little bit and add some colored sugar into the sugar bowl when I'm coating them before baking.


Spiced Molasses Cookies

1 cup Sugar
¾ cups Crisco (vegetable Shortening)
¼ cups Molasses
1 whole Egg
2 cups Flour
1 teaspoon Cinnamon
1 teaspoon Ground Cloves
1 teaspoon Ground Ginger
¼ teaspoons Salt
2-½ teaspoons Baking Soda

Preheat oven to 350 degrees.

Add flour, cinnamon, cloves, ginger, salt and baking soda to a bowl and whisk together. Set aside.

Using mixer with the paddle attachment, mix sugar, shortening, molasses and egg until well combined. Add dry ingredients and mix until combined.

Using a 1 tablespoon cookie scoop, scoop out walnut sized balls of dough and roll into balls with hands. Coat each ball with sugar and place on ungreased baking sheet. Bake for 9 - 11 minutes, allowing to bake about 1 minute after cookies begin to crack.

You can mix together 1 cup of powdered sugar with 1-2 tablespoons milk if you'd like and drizzle over cookies for a cute variation.

Tuesday, April 27, 2010

Homemade Oreos


All my efforts of scouring the internet for homemade recipes of my favorite foods is really paying off. Last week I found a recipe for these Di-Si-Dos and now I dug up this recipe for Oreos posted by Butter + Cream. Man, were they good! I gave one to Walnut and he asked me when I was going to put the drawing and letters on them...I told him mommy isn't that talented. My little Peanut broke into them and licked the middle frosting first just like a pro!


Homemade Oreos

Makes 25 to 30 sandwich cookies

For the chocolate wafers:
1 1/4 cups all-purpose flour
1/2 cup unsweetened Dutch process cocoa
1 teaspoon baking soda
1/4 teaspoon baking powder
1/4 teaspoon salt
1 1/4 cup sugar
1/2 cup plus 2 tablespoons (1 1/4 sticks) room-temperature, unsalted butter
1 large egg

For the filling:
1/4 cup (1/2 stick) room-temperature, unsalted butter
1/4 cup vegetable shortening
2 cups sifted confectioners’ sugar
2 teaspoons vanilla extract

Preheat to 375°F.

Using your electric mixer fitted with the paddle attachment, add flour, cocoa, baking soda, baking powder, salt and sugar and thoroughly mix. On low, add butter and then egg until combined and dough forms a ball around your attachment.

Using a 1 tablespoon sized cookie scoop, scoop dough onto parchment paper lined baking sheet. Cut each scoop in half and roll into balls. Flatten each ball with fingers so they are about 1/4" thick. Bake 9 minutes, rotating the cookie sheet half way through.

To make cream, put butter and shortening in mixing bowl and mix until combined. Slowly add sugar and vanilla. Put mixer on high and beat for 2 - 3 minutes until frosting becomes light and whipped.

Put frosting in a gallon size Ziplock baggie and snip about 1/2" off one corner. Put about a quarter sized ball of frosting on one cookie. Then place an equal sized cookie on top of cream and lightly press together.

Enjoy!

Monday, April 26, 2010

Ghirardelli Chocolate Chip Cookies


For years I was a Nestle chocolate chip girl. I thought that was the only brand out there for some reason. Maybe it was because that is the brand my mom always used. I have a tendancy to be brand loyal to the same companies my parents used when I was young. When I bought my first car and later my house for example, I went to their insurance agent without even shopping around.

Where the Nestle recipe tends to give me a flat crunchy cookie each time, the Ghirardelli recipe is the complete opposite. I am an avid underbaker of chocolate chip cookies. I like them to be chewy and melt in my mouth. The Ghirardelli recipes delivers on this quality! And the sizes of the chocolate chips are huge and they incredibly creamy milk chocolately too. I have not looked back at Nestle's since I opened my first bag of Ghirardelli. Sorry Nestle, but we had many good years together...I'll always keep a spot for you in my heart...

Ghirardelli Chocolate Chip Cookies

2 1/4 cups unsifted flour
1 tsp baking soda
1/2 tsp salt
1 cup (2 sticks) butter, softened
3/4 cup sugar
3/4 cup brown sugar
2 tsp vanilla extract
2 eggs
1 bag Ghirardelli Milk Chocolate Chips

Preheat oven to 375 degrees.

Whisk together flour with baking soda and salt, set aside.

In mixer bowl, beat butter with sugar and brown sugar on a medium speed until creamy and lightened in color (about 4 minutes). Add vanilla and eggs, one at a time, mixing on a low speed until incorporated.

Gradually blend dry mixutre into creamed mixture. Stir in chocolate chips by hand so not to crush them. Drop cookies onto an ungreased baking sheet and bake for 9 to 11 minutes until golden brown (unless your like me and like them under baked...then bake 7-8 minutes).

Sunday, April 25, 2010

Spaghetti Sauce


If there is one sure fire meal that I know my kids will eat no matter how stubborn they are currently being about the food they are willing (or not willing would be more appropriate) to put into their mouths, it is spaghetti. Which is absolutly fine by me because it also happens to be my favorite food too! Have you ever looked at how much salt and surprisingly...sugar is in canned spaghetti sauce? Its a lot, and somehow that sneaky high fructose corn syrup can make it in there too sometimes. I wish someone would explain to me why that keeps sneaking up into the least suspected places.

Spaghetti sauce is suprisingly easy to make and comes together in just minutes. Just a little bit of chopping and stirring and you've got one tasty, healthy, low cost meal on your hands.

Spaghetti Sauce


1 onion, finely chopped
3-4 cloves garlic, chopped
3 tablespoons olive oil
1 - 28 ounce can tomatoes (if you have home canned ones, use 1 quart)
1 small can tomato paste
1 tablespoon dried oregano
1 tablespoon dried parsley
1 tablespoon dried basil
1 tablespoon sugar
2 - 3 teaspoons salt
1 lb whole wheat pasta

Boil water in a large pot and add pasta. Cook for 7-10 minutes until al dente.

Heat olive oil in a skillet and add garlic and onion. Saute until onions are starting to turn golden brown. If you like meat in your spaghetti, add 1 pound hamburger or ground turkey now and cook until no longer pink. Add tomatoes, tomato paste, herbs, sugar and salt (start with 2 teaspoons of salt and work from there depending on your salt tolerance). Allow to simmer for about 5 minutes until sauce thickens and the tomatoes have had a chance to suck up the aroma of the herby goodness.


Garden Update


I am thrilled to say that my garden is off to a wonderful start! All plants so far have made an appearance at least with the exception of the pumpkin for some reason. The green peppers are a bit slow too...with only 4 of the 10 plants coming up. But everything else has taken off and is dying to get outside into their permanent home.


Oh, I can't wait to be pick ripe, plump tomatos and cucumbers that don't have a layer of "wax for freshness." Oh, and the herbs! I've branched out a bit this year with Rosemary, Parsley, Cilantro, Oregano, Chives and Dill. I can't wait to be cooking with fresh veggies and herbs again. Summer just can't come soon enough. For now though, I'm going to keep babying my little plants. And hopefully Peanut will quit pulling them out...


Saturday, April 24, 2010

Strawberry Rhubarb Sauce


This recipe always reminds me of my childhood growing up in rural North Dakota. My mom and dad had a beautiful garden that fed us all summer long. My mom always had rhubarb and strawberries in the garden too. And she made this sauce all the time. We topped our ice cream with it! I like to use it in place of syrup now...and I still pour it over my ice cream...or eat it straight from the spoon!

When the rhubarb and strawberries are ripe I make up a big batch and freeze them in canning jars. They usually last about 6 months in the freezer...not that they stick around that long in my house.


Strawberry Rhubarb Sauce

6 cup Rhubarb
½ c Water

Boil until tender.

Add 2 Cups Sugar and 1 Quart sliced strawberries

Heat over medium until boils, continue to boil for 2 minutes. Poor in jars and freeze.

Friday, April 23, 2010

Chicken Pesto Foccacia


This is my favorite sandwich. I love the pesto and the chicken and the fresh mozzerella...and the bread...ok, I just love everything about this sandwich! And it comes together so easily...I made the foccacia when I made pizza the other day for dinner and the chicken is left over from grilling the prior day. So tonight all I had to do was throw the sandwich together and bake it. Gosh I just love a good week of well planned out meals. Magic happens when I don't have to spend an entire evening in the kitchen cooking and I can actually enjoy a walk outside with the kids instead.

Chicken Pesto Foccacia
Foccacia Bread (recipe here)
Pesto
Tomato, sliced thinly
Fresh Mozzerella
Chicken
Set broiler on high and move rack to top position in oven.
Cut foccacia in wedges and slice down the middle lengthwise for the top and bottom slice of bread. Spread pesto liberally on both the top and bottom slice. Put chicken on bottom slice and then tomato and mozzerealla on the top slice of foccacia (make sure the mozzerella is on top so it browns in the oven.)
Put in oven under broiler about 3 minutes until chicken is hot and mozzerella has browned on top and has melted. Remove from oven and put sandwich together. Return to oven to brown top of foccacia, probably 1 minute.
Enjoy the best sandwich ever!
Of course, alternatively, you could use a panini press...which I don't own!

Thursday, April 22, 2010

Foccacia Bread


Pizza crust is incredibly versatile isn't it? It can be made ahead and stored in the fridge until you're ready to use it. It can be made into bread sticks, pizza, foccacia, dessert pizza...I've even used it for money bread because I like how light and airy this recipe is.

Tomato Basil Foccacia Bread

For the pizza dough:
1 package yeast (or 2 1/4 tsp yeast if you buy the jar)
1 cup warm water (105-115 degrees)
1 tsp sugar
1/2 tsp salt
2 tsp olive oil
2 1/2 to 3 1/2 cups flour
1 tbls corn meal

For Foccacia Toppings:
1 tbls olive oil
1 1/2 tsp dried or fresh basil
1/2 tsp kosher salt
5 or 6 thin slices of tomato

Dissolve water, yeast and sugar in warmed mixing bowl (warm bowl by running hot water over bowl). Let sit for a few minutes until the yeast forms a nice froth over top of water. Using the dough hook on your mixer, add salt, olive oil, and 2 1/2 cups of flour into bowl with the yeast and mix on speed 2 for 2 minutes.

Add additional flour 1/2 cup at a time for 2 minutes until dough pulls away from side of bowl. Mix an additional 2 minutes, still at speed 2. (You will have 6 minutes total mixing time.)

Put dough in an oiled bowl, turning dough so that oiled side is up so your dough doesn't dry out and form a crust. I always place plastic wrap loose on the top of dough then cover with a towel. Let set in a warm, draft free place for about an hour until dough has doubled. (I usually turn oven on at 400 degrees for 2 minutes, then turn oven off and put in my bread. It seems to speed the process up without cooking the dough. Just don't forget to turn the oven off after 2 minutes!)


Oil a 9" round cake pan and sprinkle with corn meal. Press dough in pan to edges and press your knuckles into the dough to form divots. Brush olive oil on top of dough and add tomatoes, then sprinkle basil and salt. Cover with towel and allow to raise a bit to desired height depending on what you are doing with your loaf. For sandwiches, which I made with this particular loaf, I allowed to the dough to double.

Bake at 450 degrees for 20 minutes.

Check back tomorrow for my most favorite grilled foccacia sandwich! Enjoy!

Tuesday, April 20, 2010

Weekday Burritos


Ah, its been hectic around here lately. Preschool, swim lessons, Sunday School, yoga, jogging club, soccer and t-ball soon to start, vacation bible study planning...it seems to go on forever and my kids are only 1 and 4! What are the actual school years going to be like for my already over-loaded schedule?


These burritos are a life saver when you only have 45 minutes to get home, cook and eat dinner and get back out the door. And...the next day throw some taco meat over a nice green salad with some sour cream and tortilla chips and have a taco salad. Its all about versatility my friends!


Cheese Beef Burritos

½ lb ground beef
2 tsp chili powder
1 can (15 oz) black beans, drained, rinsed
½ c salsa
¾ c shredded cheddar cheese

tortillas
sour cream
tomato
romaine lettuce
avocado

Cook meat and chili powder in large skillet on medium high heat until meat is no longer pink. Add beans and salsa, cook 5 minutes. Stir in cheese before serving.

Wrap all ingredients into tortillas burrito style.


Quick Cheesy Mexican Rice

1 can (10 ½ oz) condensed chicken broth (1 1/3 cups)
1 cup salsa
2 cups instant white rice
4 oz cheese

Mix broth and salsa in medium saucepan, bring to boil and
add rice and cheese, stir. Cover and remove from heat-let stand 10 minutes.

Monday, April 19, 2010

Oatmeal Peanut Butter Cookies...aka Do-Si-Dos


Oh. My. Goodness. Sorry, Girl Scouts...but you don't have anything on these cookies! I can't believe how great these were! They have all the peanut buttery nutty nummy goodness as their Girl Scout cellophane wrapped counterparts...but without the additives to extend shelf life!

The oatmeal...the peanut butter frosting in the middle...these were almost too good! I think I ate 4 of them right from the oven not to mention all the cookie dough and frosting I ate while baking and assembling them too! Then I went and ran 5 miles...and ate another 3 cookies. Oops!


I found this recipe at Savory Sweet Life, who found it at Allrecipes.com. I really hope you enjoy them as much as I did...I even laminated the recipe to make sure it will always be at my beck and call come pot lucks, holiday get togethers, cookie mailings to my brother who is a Marine...whatever occasion may occur.


Oatmeal Peanut Butter Cookies

For the Cookies:


3/4 cup all-purpose flour
1/2 teaspoon baking soda
1/4 teaspoon baking powder
1/2 teaspoon salt
1/2 cup butter, softened
1/2 cup peanut butter
1/2 cup white sugar
1/2 cup packed light brown sugar
1 egg
1 teaspoon vanilla extract
1 cup quick cooking oats

For the Frosting:


3 tablespoons butter, softened
1 cup confectioners’ sugar
1/2 cup smooth peanut butter
2 1/2 tablespoons heavy whipping cream


Directions:

Preheat oven to 350 degrees.

Using your mixer, add butter, peanut butter, white sugar, brown sugar and vanilla and mix together until creamy. Add egg and mix until incorporated.

Sift together flour, baking soda, baking powder and salt in another bowl. Add dry ingredients to the wet ingredients and stir until combined. Add oatmeal and stir.

Using a 1 tablespoon cookie scoop, drop balls of dough on cookie sheet then cut them in half. Roll each half into a ball with your hands and place onto a non-stick cookie sheet and press down with the palm of your hand to make about 1/4" thick cookies.

Bake for 8-10 minutes or until cookies are very light brown.

For filling: Cream butter, confectioners' sugar, peanut butter and cream until nice and light and creamy. Fill a ziplock baggie with filling and cut about a 1/2" off one corner to make an easy cheap pastry bag for yourself. Squeeze frosting onto half the cookies and sandwich together with the other half.

Enjoy!


Thursday, April 15, 2010

Chicken Marsala


Does this look like the face of a mischievous devil-in-training? See her little horns there hiding under all that curly hair? It is true...my little Peanut is being corrupted, drug into the world of color crayons and markers and walls. Yes, my friends, markers on my walls. In her room, the closets, on the furniture. Who you ask is the ring leader of this fiasco? It is none other then...


My Walnut of course. He's the ring leader. He puts ideas in Peanut's head so that when the wrath of Mommy comes he looks at me with those big blue eyes and says "I didn't do it, Peanut did!" Then I have to investigate to find out what really happened because I know that most of the time my little Angel wouldn't be able to come up with this stuff on her own. And Walnut knows how to lie. I've caught him several times. Where do they learn to lie like that? Are we born with a natural instinct to lie and it comes out around age 4? Is there an innocent and easy little lie that is the gate way lie and once they realize they got away with it they grow from there? Will I ever get my questions answered so I can intercept Peanuts first lie so she doesn't learn how?

So, days like these I pack my little nuts up and ship them to Grandmas so I can scrub/scour/clean/sanitize whatever they happened to have gotten into on that particular day. Then, I make myself something so delisous for dinner that all the stress from my devils-in-training melts away.


Chicken Marsala


4 Boneless/Skinless Chicken Breasts
Salt and Pepper
1/2 cup flour
4 Tbls Butter
16 ounces Fresh Mushrooms
2-3 cloves Garlic
1 cup Marsala Wine
1 cup Chicken Broth
1/2 cup Heavy Cream

Preheat oven to 375 degrees. Season chicken breasts with salt and pepper on both sides. Place flour on a plate and dredge chicken breasts through flour to make a thin coating on each breast.

Heat and 1/4" oil in skillet over medium high and place chicken breasts in hot oil. Fry each piece for about 4-5 minutes on each side until breasts are golden brown. Remove chicken from fry pan and place on a tin foil lined baking sheet and place in oven for about 20 minutes until breasts are done all the way through.

Meanwhile, pour off excess grease from skillet and add butter. Once melted add mushrooms and garlic and lightly salt and pepper. Saute mushrooms for about 5 minutes until brown and soft. Add in marsala wine, chicken broth and heavy cream. Make sure to scrape all the bits off the bottom of the pan with the spatuala while stirring. Allow to reduce by about 1/3, about 5 minutes.

Pour mushroom sauce over chicken and serve with mashed potatoes, rice or noodles.

Enjoy!


Wednesday, April 14, 2010

Lemon Bars


When life gives you lemons...you make lemon bars right? All that sugary, sour sweetness is exactly what I need to bring a little sunshine into some not so sunny days here in Minnesota. Spring is great...but lately the warm days have also brought a lot of wind which has forced my running back indoors. I really don't like the extra work to run into the wind along with the blowing sand and dirt that comes with it. But, on the bright side I've been able to use the track to time my miles again and see where I'm at. And guess what? I've gotten my miles down to 9 minutes and 15 seconds since hitting the outdoors this last February. That's 45 seconds faster per mile from last summer! I'm proud of that.
I learned today that there is a Triathlon Club in a city near mine and they meet every Tuesday and do hill sprints! Boy, that sounds crazy doesn't it? I mean, who the heck wants to run uphill on purpose for 30 minutes? Me...that's who. I am so there! Run up the hill, walk down and repeat. With other crazy people who want to do it too. Did you know that sprinting uphill actually will improve your over time in distance running? Yep! And I bet it burns extra calories so I can eat a few more lemon squares...

Lemon Squares
From Belle of the Kitchen (click to see her blog post)

For the Crust
1 3/4 c Flour
2/3 c Powdered Sugar
1/4 c Cornstarch
3/4 tsp Salt
1 1/2 sticks Unsalted Butter

For the Filling
6 eggs, room temperature
3 cup sugar
Zest from 2 lemons
1 cup Lemon Juice (I used 5 lemons to get this much)
1 cup Flour
Powder Sugar for dusting

Preheat oven to 350 degrees. Spray a 13x9 lasagna pan with cooking spray and line with parchment paper, letting the paper come up the sides.

Add flour, powdered sugar, cornstarch and salt to food processor and pulse to blend. Cut butter into pats and add to food processor, blending for about 10 seconds. Then pulse until mix is pale yellow and looks like coarse meal...it should be about an additional 3 seconds of blending. Put mixture in your lined dish and press firmly with your fingers or a measuring cup to form an even layer over the entire pan. You should end up with about a 1/4" thick crust. Refrigerate for 30 minutes then bake 20-25 minutes until golden brown.

While the crust is baking, whisk together eggs, sugar, lemon zest, lemon juice and flour. When crust is done, pour lemon mixture over crust and bake an additional 30 to 35 minutes until the filling is firm and set. Allow to cool completely at room temperature. Use the parchment paper to remove from pan before cutting (make it easy on yourself). Peel down the sides and use a knife or pizza cutter (my favorite) to form however many bars you'd like...but these suckers are sweet and sour so you might want to keep them on the small side. Sprinkle with powdered sugar before serving.

Monday, April 12, 2010

Hot Artichoke Dip


I love any kind of dip there is...I dip almost all of my food in something or other...bbq sauce, ketchup, sour cream, ranch, the list goes on. My big Walnut on the other hand, has never once in his life dipped anything. Not even his apple dippers into the caramel at McDonald's (not that we go there that often, but I will get them some apples if we happen to be going by one and they need a snack). He won't let gravy touch his plate even! He likes solid foods, sorted out on his plate so that nothing is touching. I just can't explain it.
This has to be about the easiest and tastiest appetizer dip there is. And its so versatile...serve it on chips, bread, pitas, crackers or right off the spoon (ok...maybe that last one is just me.) Substitute shredded Parmesan instead of grated to make it creamier and use it as a topper for grilled chicken breast. It seems the options are endless for this one here.

Hot Artichoke Dip

1 can (14 oz) artichoke hearts, drained and chopped

1 c Mayo

2 cloves garlic

1 c grated parmesan cheese

2 tbsp chopped tomatoes

1 green onion, sliced


Heat oven to 350

Mix first 4 ingredients

Spoon into shallow ovenproof dish or 9” pie plate

Bake 20 to 25 minutes until hot and bubbly. Garnish with tomatoes and onions and serve with bread or crackers.


White Chili


I absolutely love anything that can be made in large quantities and frozen for a later date, at which I am so exhausted that I can't bear to look in my kitchen's direction. This chili is it! The recipe is from The Pioneer Woman and boy is it good! And it makes a ton...enough for a heaping bowl for the family at dinner time and then freeze the rest for later. I can't say my husband loves this approach as much as I do, because of course he'd much rather have fresh made food everyday, but he's not the one standing in the kitchen either.
A while back I found these plastic canning "jars" made by Ball. I think they are more for like freezer jams, but they hold 8 ounces each (a just right serving size) with a plastic lid that screws on and they work perfect for freezing soups and hot dishes. My freezer is full with them. I'm all about making it easy!

Speaking of making it easy...I made my chili with leftover turkey from Easter. I love cooking turkeys too...I can get about 4 meals out of them!

White Chili

  • 1 whole Fryer Chicken, Cut Up (or 3 Cups Cooked Chicken)
  • 1 whole Medium Onion, Diced
  • 4 cloves Garlic, Minced
  • 2 whole Cans Green Chilies, Chopped
  • 1 pound Dried Great Northern Beans, Rinsed
  • 8 cups Chicken Broth
  • 1 whole Jalapeno, Sliced
  • 1-½ Tablespoon Ground Cumin
  • ½ teaspoons Paprika
  • ½ teaspoons Cayenne Pepper
  • Salt To Taste
  • White Pepper, To Taste
  • 1 cup Whole Milk
  • 2 Tablespoons Masa (corn Flour) OR Cornmeal
  • Grated Monterey Jack, To Taste
  • Sour Cream For Garnish
  • Cilantro For Garnish
  • Guacamole (optional)
  • Pico De Gallo (optional)
  • Corn Tortillas (warmed)
Preparation Instructions

Cover chicken and cook for 20 to 30 minutes or until done. Remove meat from bones. Set aside.

In a dutch oven over medium-high heat, saute onions and garlic for 2 minutes. Add chopped green chilies, then rinsed beans. Pour chicken broth into the pan. Add sliced jalapenos. Season with salt, pepper, and cumin. Place lid on pot and reduce heat to low.

Cook for 2 hours or until beans are done. Halfway through the cooking process, add 3 cups of cooked chicken.

When beans are tender, mix milk with masa (or cornmeal) and pour into the chili. Cook for an additional ten minutes to thicken. Check seasoning and adjust, adding cayenne pepper and paprika if desired.

Add some Monterey Jack cheese to the pot and stir to melt.

Serve chili in a bowl. Garnish with cilantro, sour cream, extra cheese—even pico de gallo and guacamole, if you have some on hand. Roll up warm corn tortillas and serve on the side of the bowl.

Friday, April 9, 2010

Lemon Asparagus Pasta

Nothing says Spring and Summer like lemon and asparagus! I found some asparagus on sale at the grocery store the other day for $1.49 per pound. I love it when fruits and veggies come into season so they are affordable again. So, yesterday I searched the internet for a recipe using my bargain asparagus and came across Half Assed Kitchen's Lemon Asparagus Pasta. It was divine! The lemon in the sauce was perfect and the asparagus is always good! I used skim milk instead of heavy cream in my sauce though, so I left out the 1/4 cup of pasta water. I bet it could be served cold too and be pretty good. I don't have any leftovers though, so I won't be able to find out... Enjoy!


Asparagus Lemon Pasta
from Half Assed Kitchen


1 pound asparagus, trimmed and cut diagonally into 1/2-inch thick slices
1 pound bow-tie pasta
3 Tablespoons unsalted butter or margarine
3/4 cup heavy cream, half-and-half or plain Silk creamer
2 teaspoons freshly-grated lemon zest
1/4 cup fresh lemon juice
3/4 teaspoon salt
1/3 cup fresh, flat parsley leaves, chopped
Freshly ground pepper
Grated parmesan cheese


Steam asparagus until crisp-tender (about 5 minutes). Transfer to a colander and rinse with cold water. Drain well and set aside.
Meanwhile, bring water to boil in a sauce pan. Add pasta and cook until al dente.
In a deep skillet, heat butter and cream over moderately low heat until butter is melted. Stir in zest, lemon juice and salt.
Ladle 1/4 cup pasta water into sauce and drain pasta.
Immediately add pasta and asparagus to sauce in skillet. Cook and toss until warmed through. Add parsley, pepper and top with parmesan.

Thursday, April 8, 2010

Maple Baked Beans


Before I had children...I never thought about what I put into my body for food. I never turned down a chance to go out to eat. I rarely cooked something if it wasn't frozen or from a box. In fact, I think for at least the first month of marriage my husband and I ate frozen dinners. We had a very sporadic schedule and I didn't exactly know how to cook. I remember our 1 month anniversary, I made mashed potatoes and little steaks that were cheap at the store...it was 11:30 pm and he had just got off work and I had to get up at 5:00 am to get to class. But there we sat at midnight with steak and mashed potatoes...and he didn't eat any of it. The steak was "rubbery" and the potatoes were over salted.
When we decided to start trying for our first child 5 years ago, I was 220 pounds and miserable. I felt sluggish, I felt fat, I had no motivation. And I remember reading a book about conceiving and realized being obese could have an effect on my fertility as well as the baby's health. That is when things started to change. Very slowly indeed. I started working out every day and got down to 170 pounds before finally conceiving but I hadn't really adjusted my diet yet.
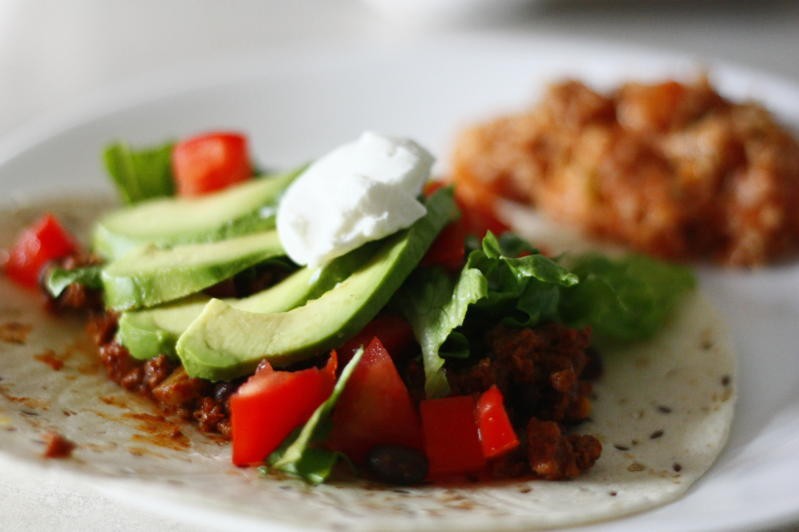
Then one day when I was preparing dinner, and Walnut was just starting on solid foods...I was making Stove Top Stuffing and flipped over the box to the ingredient/nutritional information. What the heck?!?! Look at all that sodium, mono-this, di-glycerite that, mono-sodium glutamate, oh and the list went on! It took me a few years to completely phase out boxed and frozen dinners, but now it is rare to find them in my house. I make my own pizzas (which taste way better anyways), beans, spaghetti sauce, stuffing, soups...this list goes on and on. I do treat my kids though to a box of Annie's organic Macaroni and Cheese, because quite frankly, I love macaroni and cheese.
Since I started running regularly and cutting out unnecessary processed foods, I can tell the difference in my body too. I've trimmed down to 145 pounds without a single day of dieting. I have plenty of energy to make it through work, running, dinner, kids, and cleaning the house in a single day. I am happier and feel better about myself then I ever have before.
Mostly, I want to do whatever I can for my children to make sure they don't grow up to be obese, or develop type II diabetes when they are still teenagers. I want them to be able to live a happy and active life, and not be held back by poor decisions I made for them when they were too young to make them for themselves. I want to be able to give my children the tools they need to live a long healthy happy lives and start good habits early such as eating their fruits and veggies and exercising and passing up on dessert every once a while. I don't want them to go through the struggles I did with my weight or be teased for being the "fat kid."
So, I do the best I can to set the best examples for them. I eat fresh fruits and veggies every meal and make sure they at least try them. I let them try to workout with me if they want to if I'm doing a video in the house. I bring them on runs with me in the stroller or on their bike so they can see mommy moving her body.

Here is a recipe for Maple Baked Beans that are awesome! They rival Bush's any day, but without the high-fructose corn syrup and mono-sodium glutamate. And beans are low in fat, and high in fiber and protein!


Maple Baked Beans


1 pound dried navy or great northern beans
2 tablespoons brown sugar
2 teaspoons salt
1/4 teaspoon freshly ground black pepper
2 tablespoons Dijon mustard
2 tablespoons molasses
1/4 cup tomato sauce
1/2 cup pure maple syrup
2 thick strips bacon, cut in 1/4 inch pieces

In a large pan, cover the beans with water. Bring to a boil and simmer until tender, about 1 hour.

Preheat oven to 300°F.

In a bowl, combine everything else except the bacon. Add to the beans. Stir in the bacon. Add just enough water to the pot to cover everything. Cover the pot with aluminum foil, then a lid. Bake for 5 hours, checking hourly to make sure the beans aren’t drying out. (Add more water as necessary to keep them submerged.) Uncover for the last half hour to brown the top, if desired.

Wednesday, April 7, 2010

Pico De Gallo and Guacamole


The scent of spring, sprouting flowers and sunshine are filling the air! It is making me itchy to get gardening too! Last week Walnut and I got our seeds started in the house and guess what? They are already starting to sprout! So far I've got oregano, basil, tomato, pepper and pumpkin seed sprouting. I am so tickled I could scream! I wasn't so sure how starting my own plants in the house would go, but am extremely encouraged by the turnout so far...

I made some Pico de Gallo for Easter to set out for guests while dinner was in the final stages of baking and it made me long for my garden even more. Tomatoes bought in the store never ever live up to my hopes and leave recipes falling flat compared to tomatoes straight from your own backyard...but from September to June in Minnesota...you don't have many other options!

Pico de Gallo

4 large tomatoes
3 jalapenos, deseeded
1/2 large red onion
1 handful cilantro
Juice from 1/2 lime or lemon
Salt to taste

Chop tomatoes, jalapenos, and onion to a small dice and put in a bowl. If you like it hot...you can go ahead and leave the seeds in the jalapenos. Next chop up a handful of cilantro and toss in the bowl. Squeeze juice from lime or lemon over the top and sprinkle with desired amount of salt...fold together. I usually let it sit for a little before digging in to make sure all the flavors have harmonized together!

Have a hankering for some Guacamole? Mash three ripe avocados and fold in Pico de Galo and give another good squeeze of lime or lemon juice.

Tuesday, April 6, 2010

Citrus Honey Butter


My kids are testing me this week...that is for sure. The "boundary line" is being pulled, stretched, twisted and torn. While it makes my heart sing that Walnut is finally gaining some independence from mom and doing such things as getting dressed by himself, buckling his seat belt by himself, fully participating and listening in swim lessons and putting on his own shoes...he is trying to push it as far as he can it seems. Saturday morning it was just me and the kids at home and I had to jump in the shower, which I've scientifically narrowed down to a measly 7 minutes since becoming a mom, Walnut decided that him and Peanut wanted to play outside. So, being the big kid he is now, he got his coat and shoes on, his sister's coat on her along with Grandma's boots. Just as I was turning off the shower I heard the outside door slam! So, knowing full well what he must have been up to I went flying down the stairs and outside just wrapped in a towel screaming and ushering the children back into the house telling Walnut every scary story I could think of that could happen to him had he gone outside unaccompanied by an adult.
Oh, and this is just the start of the weekend. On Sunday he was riding his bike outside and Dad's car was parked in the driveway. Well, the car happened to be in his way so as I rounded the corner from the other side of the house I see Aden jumping into the driver's seat and closing the door as if he was going to move the car himself! Ah! What are my children thinking? I think they are trying to give me a heart attack is what I think.
And on Monday, after a long day of work, a 5 mile jog and running across half the state to shuttle Walnut to ECFE and then pick Peanut up from Grandma's afterward I was finally home at 8:45 pm ready to drop into bed, only to discover Peanut was also discovering a sort of independence of her own...as in using the living room as her canvas! She colored the sofa, end table, tv, tv stand, picture frames and my dumb bells. I have no clue what type of marker she used either. So when I inquired what exactly my husband was doing during her little artistic episode he informed me he was in the shower and was so busy he didn't have time to clean it up. And that she also colored herself from head to toe. Upon further examination...she was indeed colored from head to toe, but it appears Grandma had attempted to scrub off what she could.

So, on days like these, I need something sweet, savory and fulfilling to give me the will to start over the next day! Stir together these three ingredients together and jump in the shower and by the time your done all the flavors have infused and you again will have a purpose in life...to spread this delicious butter on everything from pancakes to biscuits to whatever you have in your kitchen!


Citrus Honey Butter


1 stick butter, room temp
1/3 cup honey
zest from 2 oranges

Stir all ingredients together in a bowl and let set for 30 minutes before enjoying!

Biscuits
Recipe by The Pioneer Woman

4 c all-purpose flour
1 tsp salt
2 ½ tsp baking soda
1 ½ tsp baking powder
1/3 c shortening
1/3 c cold butter, cut into pieces
1 ¼ c buttermilk

Preheat oven to 450.
In a large bowl, combine all the dry ingredients and whisk together.
Add the shortening and cold butter pieces and cut together with a pastry cutter until mixture resembles coarse crumbs.
Pour in buttermilk and mix gently with a fork until just combined.
The biscuit dough will be sticky.
Lightly flour a clean surface and roll dough out to about ¾ to 1 inch thick.
Cut into any shape and bake 11 – 14 minutes until golden brown.


Monday, April 5, 2010

Cream Cheese and Chive Biscuits and Easter!


Wow! Easter came and was over in a flash! What a great weekend it was though...filled with great food, friends, kids and wine. Any time I have an excuse to invite people I love being with over and serve great food I'm all over it. This year I made my entire dinner from scratch...not a single box or can allowed in my kitchen. Sunday afternoon as I was surrounded by my beloved family we feasted on turkey, stuffing, au gratin potatoes, baked beans, cream cheese chive biscuits, artichoke dip with sourdough bread and for dessert lemon bars and almond bars. Oh, I don't think I could move after about 3pm I was so stuffed. When it was bed time, the kids were sitting on my lap as I read them stories and I thought I was going to explode, but it was all worth it to enjoy the company around me and watch them enjoy the food I spent two full days preparing.


I made everything I could Saturday so that come Sunday I wouldn't be too stressed out...and as I was elbow deep in biscuit dough I looked at Peanut and said "oh, sweetie, are you ready for a nappy?" And her tired little eyes looked at me and she said "yeah, night night mommy" and she laid her little head down on the counter and went to sleep! This is the first time I can remember that she went to sleep herself without rocking her. I think all the goings on in the kitchen must have worn her out!

I'm going to post the cream cheese and chive biscuit recipe because they turned out stellar! But, the recipe as it was written on another blog didn't work for me exactly...I ended up adding about 1 1/2 cups additional flour than what was called for, and since I spent $4 on chives at the grocery store because I don't have a garden yet I was not about to scrap the project. I don't know if it was just me or not but I had one very sticky mess on my hands for a while. After adding so much additional flour that required a lot of additional stirring (recipe had said to only mix until combined) I was worried I'd end up with rocks for biscuits...but to my delight they were soft and tender!

Cream Cheese and Chive Biscuits (Martha Stewart)

  • 3 1/2 to 4 cups all-purpose flour (original recipe called for 2 1/2)
  • 1 1/2 teaspoons baking powder
  • 1/4 teaspoon baking soda
  • 1 1/4 teaspoons salt
  • 1 tablespoon granulated sugar
  • 1/4 cup finely chopped fresh chives
  • 1 stick (1/2 cup) unsalted butter, cold, cut into small pieces
  • 4 ounces cream cheese, cold, cut into small pieces
  • 1 1/4 cup buttermilk

Preheat oven to 425 degrees.

In a large bowl, whisk together flour, baking powder, baking soda, salt, sugar and chives. Cut butter and cream cheese into pats and blend with a pastry blender or fork until mix resembles coarse crumbs but still with a few bigger clumps remaining.

Pour in buttermilk and combine with a fork until just incorporated. Dough should be slightly sticky. Do not overmix.

Put dough on a lightly floured work surface. Gently knead a few times until all crumbs are incorporated and roll with a rolling pin into roughly a 8x11 inch rectangle and 1" thick. Fold dough into thirds like you would a letter and roll dough out again and fold into thirds. Wrap dough in plastic wrap and refrigerate 30 minutes.

Put dough back onto floured work surface and repeat the rolling and folding process two more times. (By the way, this helps create a layers in the biscuits...kind of like the Pillsbury biscuits from the can!) Finally, roll dough out about 1" thick and using a sharp knife or your pizza cutter, divide into 12 equal squares or rectangles (if you really like circle biscuits...go for it!) Place each biscuit onto a parchment paper lined baking sheet about 1 1/2 inches apart. At this point you can either flash freeze biscuits or bake!

Put biscuits in preheated oven for 15 to 18 minutes, rotating halfway through baking time. Biscuits should be golden brown. Transfer to wire rack to cool.

Enjoy!!

Friday, April 2, 2010

Easy Egg Bake!


Oh, lovely Spring...it is so nice to see you again! I spent the day cleaning and baking and doing my usual Friday routine...but with the windows open! It is probably just me...but for some reason a clean house seems so much cleaner with the windows open in the spring! Listening to the birds chirping and the kids playing outside has to be my favorite thing. We even broke out the shorts and the sidewalk chalk on Thursday evening. I love it when my driveway is colored with pastel chalk, too. It just fills me with a sense of happiness...watching my two little artists create their scribble masterpeices where ever they want to...a huge blank canvas for them to do whatever is in their little hearts. Another sure sign of Spring arriving is Walnut and I have officially started our garden. We have 72 little containers of soil holding 11 different types of seeds that will hopefully grow and be planted in our garden come Memorial weekend. I've never started my own plants in the house before so I'm praying for at least half of them to make it to their final destination. I will definately keep updates going on this little project.

With Easter only 2 days away...I thought I would share an egg bake recipe today that would be perfect for a brunch and takes little fuss to throw together, leaving more time to play outside!


Easy Egg Bake
Adapted from The Pioneer Woman

1 Loaf Sourdough Bread
1 c grated cheddar cheese
½ stick butter
6 ounces cream cheese
10 eggs
2 cups milk
½ tsp dry mustard
1 dash cayenne pepper
½ tsp salt
1 bunch chopped parsley

Generously butter a 9x13 baking dish. Tear bread into chunks and place them in the bottom of the baking dish. Sprinkle with cheddar cheese, then tear cream cheese into small pieces and place over the top. Cut butter into pats and place over the top.
Mix remaining ingredients and pour over the top of the dish. Cover and refrigerate overnight.
The next morning, bake at 350 degrees uncovered for 1 hour or until top is golden brown and eggs are completely baked.

Enjoy!

Thursday, April 1, 2010

Banana Muffins with Brown Sugar Topping...


Ugh! I went to the chiropractor this morning to help relieve some pain I've been feeling in my right hip from running. Every other morning for the last two weeks I've been getting up early so I can sneak off to his office before work. It's been a godsend each morning I've visited him...laying on the table with no kids yelling and pulling on me with nice warm blessed towels on my back loosening up all those tight, aggravated muscles from running each night, and then having every bone in my body cracked like I was a rag doll. You really need to see my chiropractor...I think he missed his calling as a NFL linebacker. When he tells you its time for a bear hug, he isn't kidding!
But this morning was slightly different. My knee had also begun bothering and asked him if he had any recommendations. He then proceeded to touch my outer leg between my knee and hip which send me shooting through the roof with pain. Apparently, I have a major "speed bump" in the long muscle that runs down the side of my outer leg and is causing my knee to pull to the side as I run.
And what does a rolling pin have to do with all of this? While laying on my side, the chiropractor grabbed a rolling pin and started rolling out my muscles as if it was pie dough trying to get the muscle to relax. I CANNOT explain in words the pain this rolling pin over the speed bump put me in. I've never felt anything like it! And he was barely even pushing on it! He then proceeded to tell me I needed to do it 2 to 4 times A DAY! And to have someone else do it because I won't push HARD ENOUGH! AHHHHHH!!!!!!
In times like these...I need chocolate! Lots of it pronto! Chocolate makes all kinds of things better. Being it was still only 7 am when I got back from my torture visit, I quickly mixed up a batch of these wonderful Banana Chocolate Chip Muffins with a crunchy brown sugar topping. Perfect for breakfast and to satisfy your sweet tooth at the same time. Enjoy!!

Banana Muffins with Brown Sugar Topping

1 ½ c flour
1 teaspoon baking powder
1 teaspoon baking soda
½ teaspoon salt
¼ teaspoon allspice
¼ teaspoon cinnamon
3 whole bananas, mashed
¾ c sugar
1 whole egg
1/3 cups melted butter
½ bag milk chocolate chips (optional)

Topping
1/3 c brown sugar
2 Tablespoons flour
1/8 teaspoon Cinnamon
1 tablespoon room temp butter

1. Preheat oven to 350 degrees. Coat muffin pans with nonstick spray or use paper liners. Sift together the flour, baking powder, baking soda, salt and spices; set aside.
2. Combine bananas, sugar, egg, and melted butter in a large bowl. Fold in the flour mixture and mix until smooth (DO NOT over mix or will be tough). Gently stir in chocolate chips. Scoop into muffin pans.
3. Prepare the topping. In a bowl, mix together brown sugar, 2 tablespoons of flour and additional cinnamon. Cut in 1 tablespoon butter and sprinkle over muffins.
4. Bake mini muffins for 10 to 15 minutes and large muffins for 25 to 30 minutes. When done, muffins will spring back when lightly tapped.